
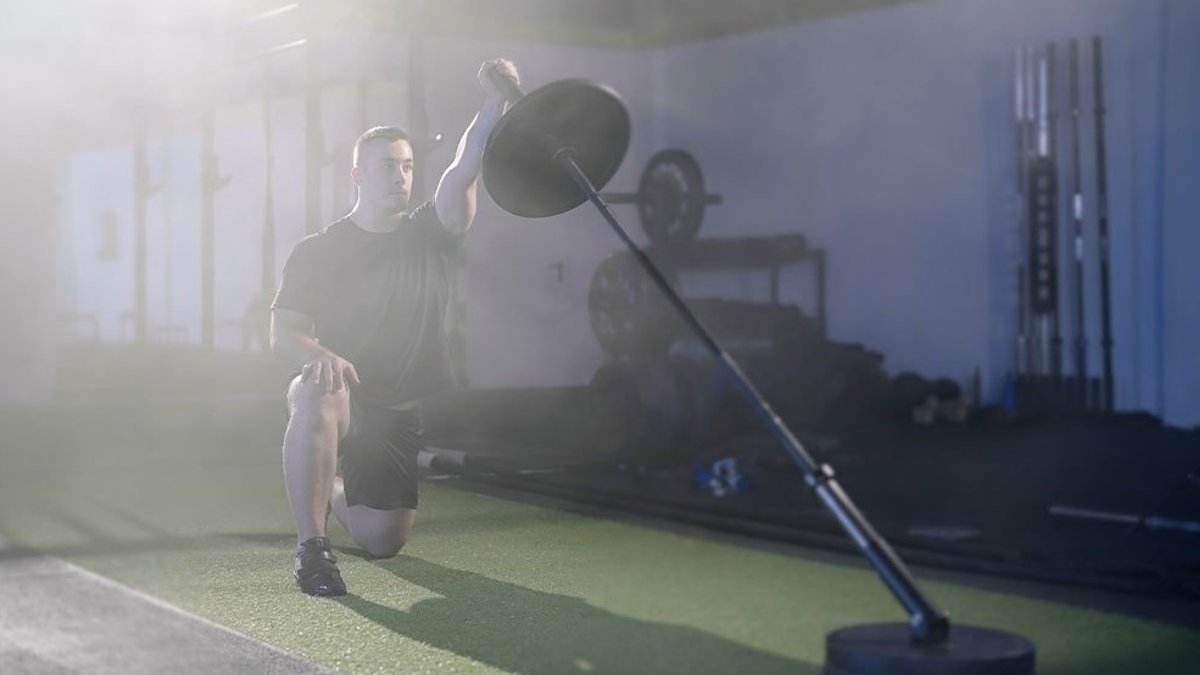
The half-kneeling landmine press can add shoulder strength, but the exercise hinges on a precise setup. Getting the knee placement, grip, and body alignment right prevents you from fighting the bar instead of pressing it, and it lets the targeted muscles work efficiently.
Pick the Right Knee Position
When you press with the right arm, you have two options. Placing the left knee down and the right foot forward creates a contralateral stance, which gives the back hip more assistance and lets the shoulder move freely overhead. The opposite arrangement—right knee down, left foot forward—is called an ipsilateral stance and forces the core to resist rotation.
Coaches usually suggest starting with the contralateral version. Once you feel stable, you can test the ipsilateral setup to see which side produces a stronger press without compensations.
Set the Foot, Hip and Glute Foundations
Begin by planting the front foot so the ankle sits directly under the knee. The back knee should stay under the hip, not drifting too far behind. Keep a lateral gap between the front foot and back knee; this width helps block unwanted twisting.
Read Also: Track and Field Offers Record Prize Money
Maintain level hips facing forward and lightly squeeze the glute on the side of the down knee. This glute cue creates tension across the reduced base of support, which is essential for transferring force from the ground to the pressing arm.
Finding the correct distance from the landmine attachment is a matter of balance. You want to be close enough that the bar’s end reaches the working shoulder without forcing you to lean forward, yet far enough that the bar does not crowd the shoulder joint. Adjust until you can stay tall, with ribs stacked over the hips.
Choosing a grip depends on hand size and sleeve thickness. A cupped end-of-bar grip wraps the fingers around the bar’s tip, while a sleeve grip encircles the shaft itself. Regardless of style, keep the wrist neutral and the grip tight to preserve forearm alignment.
For most lifters, the wrist-over-forearm position offers the best power transfer. Align the elbow directly under and slightly in front of the hand, then set the shoulder down without over-retracting it.
Read Also: FDA expands warning on toxic weight-loss supplements
Before the first rep, take a deep belly breath, brace the core, and keep the hips and shoulders square. This full-body tension, combined with the down-knee glute squeeze, creates a solid platform for the press.
Common Setup Mistakes
One frequent error is positioning the kneeling foot too far from the landmine. When distance exceeds the sweet spot, the lifter leans forward to reach the bar, compromising spinal alignment and reducing power output. The correction involves stepping back until the bar rests slightly in front of the working shoulder while the torso remains upright.
Gripping the thick end of the sleeve with a small hand forces the wrist into hyperextension before any press begins. Switching to the cupped end-of-bar grip or adjusting hand placement restores a neutral wrist and improves control.
Final Checklist Before the Set
Remember to verify each element of the pre-lift routine. Confirm the chosen knee orientation, then ensure the lateral gap between front foot and back knee is sufficient to resist rotation.


